Removing the ID (Huawei ID) and FRP (Factory Reset Protection) from a Huawei Nova 9 (NAM-LX9) after using the test point method involves a series of steps. Here’s a step-by-step guide:
Requirements:
- Huawei Nova 9 (NAM-LX9) device
- Windows computer
- USB cable

- Test point tool or cable
- FRP and Huawei ID removal tool (such as SigmaKey, UMT, etc.)
- Backup of important data (as the process may erase data)
Procedure:
- Identify Test Points:
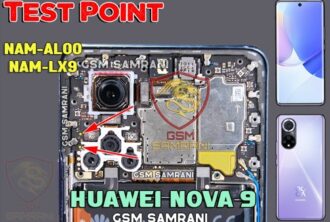
- Locate the test points on the Huawei Nova 9 (NAM-LX9) motherboard. These points are typically small pads or pins that need to be shorted to put the device into a specific mode.

- Prepare Test Point Tool:
- Ensure you have the necessary test point tool or cable to access the test points safely.
- Power Off the Device:
- Turn off your Huawei Nova 9 completely.
- Enter Test Point Mode:
- Use the test point tool or cable to short the test points on the Huawei Nova 9 motherboard while connecting it to your Windows computer via USB.
- This action puts the device into a special mode, often referred to as Qualcomm HS-USB QDLoader 9008 mode, allowing low-level interaction with the device’s hardware.
- Launch FRP and Huawei ID Removal Tool:
- Open the FRP and Huawei ID removal tool (e.g., SigmaKey, UMT) on your Windows computer.
- Select Device Model:
- In the tool’s interface, select the appropriate model of your Huawei Nova 9 (NAM-LX9).
- Initiate FRP and ID Removal:
- Follow the instructions provided by the tool to initiate the FRP and Huawei ID removal process. This usually involves selecting options like “Remove FRP” or “Remove Huawei ID” within the tool’s interface.
- Wait for Process Completion:
- Allow the tool to perform the necessary operations, such as reading device information, resetting FRP, and removing Huawei ID. This may take some time, so be patient.
- Device Reboot:
- After the process is complete, the tool will instruct you to reboot your Huawei Nova 9.
- Verify Removal:
- Once the device reboots, verify that the FRP and Huawei ID have been successfully removed. Set up the device without encountering any lock or authentication issues.
- Restore Data (if necessary):
- If any data was erased during the process, restore it from your backup.
- Finalize:
- Safely disconnect your Huawei Nova 9 from the computer and complete any remaining setup steps.
Always be cautious when working with hardware components, and ensure that you follow the instructions provided by the tool carefully to avoid any damage to your device.