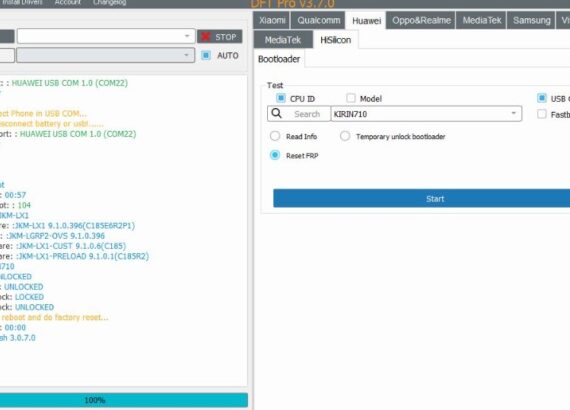
remove FRP (Factory Reset Protection) on a Huawei Y9 2019 using Fastboot mode with DFT Pro, you would typically follow these steps:

Connection
=
Connected Port:
Write : Xloader
Write : Uce
Please Reconnect Phone in USB COM…
Make sure to disconnect battery or ustl…..
Reconnected Port: : HUAWEI USB COM 1.0 (COM22)
Write : xloader
Write : Uce
Write : Init
Write : Init2
Write : Fastboot
Operation tim 7
Wait for fastboot: : 104
Device Model: JKM-LX1
Device Firmware: :JKM-LX1 9.1.0.396(C185E6R2P1)
Base Firmware: :JKM-LGRP2-OVS 9.1.0.396
Custom Firmware: :JKM-LX1-CUST 9.1.0.6(C185)
Preload Firmware: :JKM-LX1-PRELOAD 9.1.0.1(C185R2)
Platform: KIRIN710
Device Lock: UNLOCKED
Device FB Lock: UNLOCKED
Device USER Lock: LOCKED
Device USER Lock: UNLOCKED
The device will reboot and do factory reset.
Operation time: 00:00
Operation: Finish 3.0.7.0
{UAWET USB COM 1.0 (COM22)
- Preparation:
- Ensure you have the necessary drivers installed on your computer.
- Download and install DFT Pro on your computer.
- Put your Huawei Y9 2019 into Fastboot mode:
- Power off your device completely.
- Press and hold the Power button and Volume Down button simultaneously until the Fastboot mode screen appears.
- Connect your Huawei Y9 2019 to your computer:
- Connect your Huawei Y9 2019 to your computer using a USB cable.
- Launch DFT Pro:
- Open DFT Pro on your computer.
- Perform the FRP removal process:
- Within DFT Pro, select the connected Huawei Y9 2019 device.
- Follow the on-screen instructions provided by DFT Pro to initiate the FRP removal process.
- This process usually involves sending specific commands to the device via Fastboot mode to unlock the bootloader or perform other necessary operations to remove FRP.
- Wait for the process to complete:
- Allow DFT Pro to execute the necessary commands and complete the FRP removal process.
- Device Reboot:
- Once the process is complete, your Huawei Y9 2019 will reboot automatically.
- Verification:
- After the device restarts, verify that the FRP lock has been successfully removed by navigating through the device setup screens.
It’s crucial to ensure that you have the correct tools and follow the instructions carefully to avoid any potential issues or data loss during the FRP removal process. Additionally, please note that FRP removal processes may vary depending on the specific tools and methods used. Always proceed with caution and make sure you understand the risks involved.